 AP Studio layers
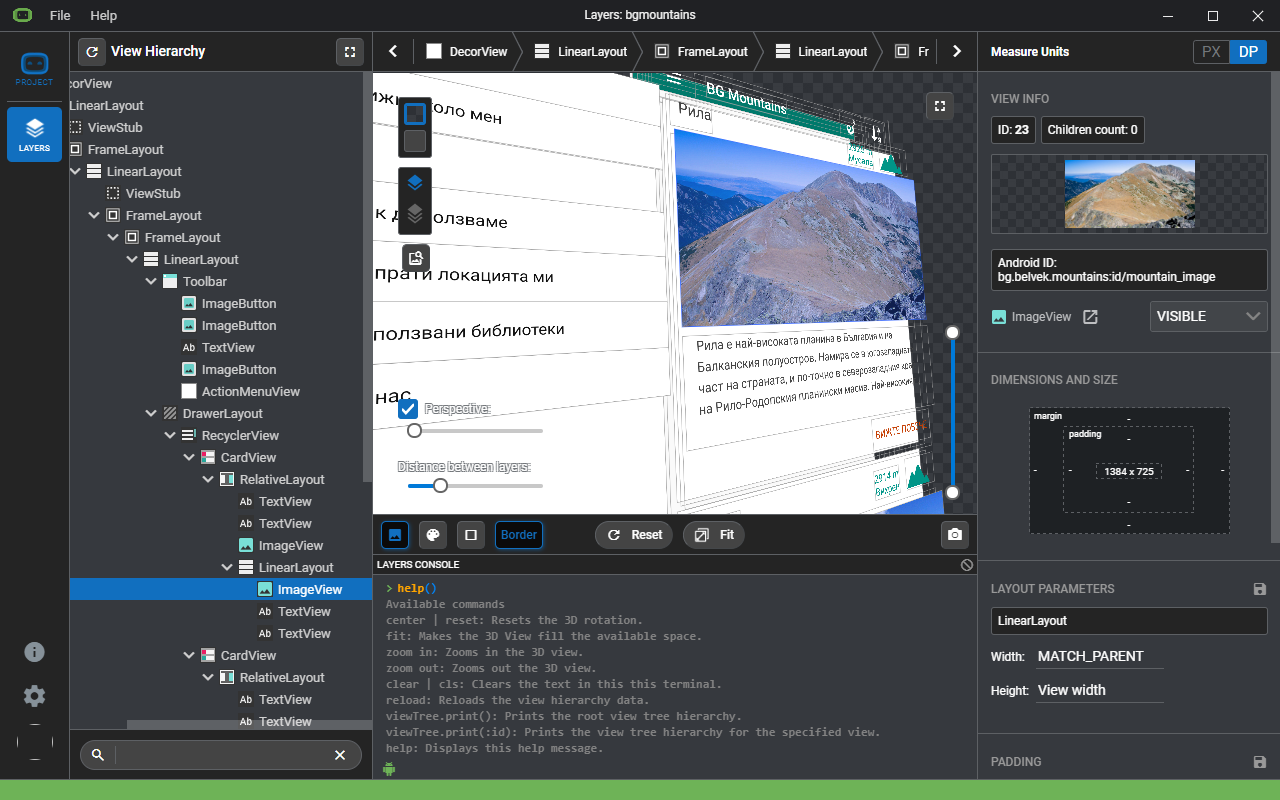
Layers: View hierarchy in 3D
Step 1 Add AndroidPal maven server to your project-level build.gradle
star You can use the auto completion feature of the editor and position the cursor to the repositories section of allprojects and type "ap" and select the "Add AndroidPal maven server." auto completion suggestion.
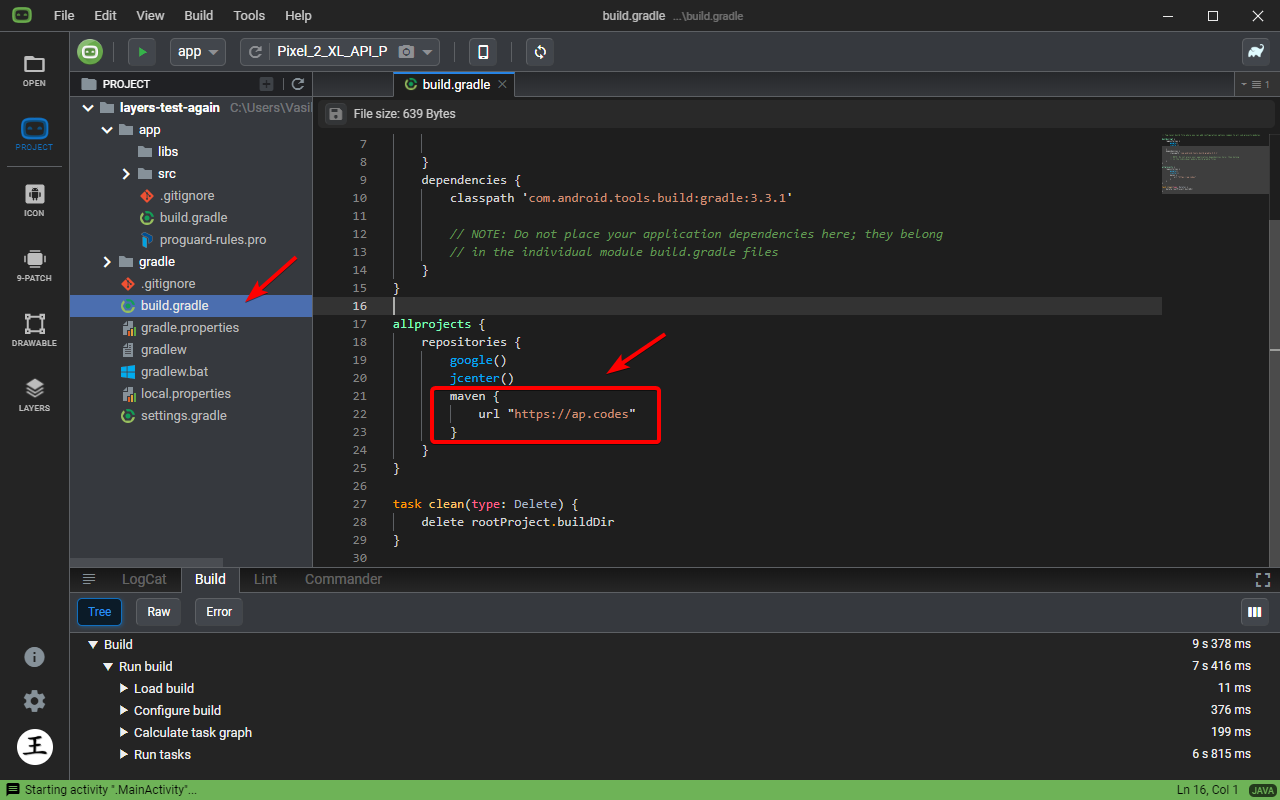 |
        maven {
            url "https://ap.codes"
        }
|
Step 2 Declare layers lib in project app level build.gradle
star You can use the auto completion feature of the editor and position the cursor in the dependencies section and type "ap" and select the "Add Layers lib." auto completion suggestion.
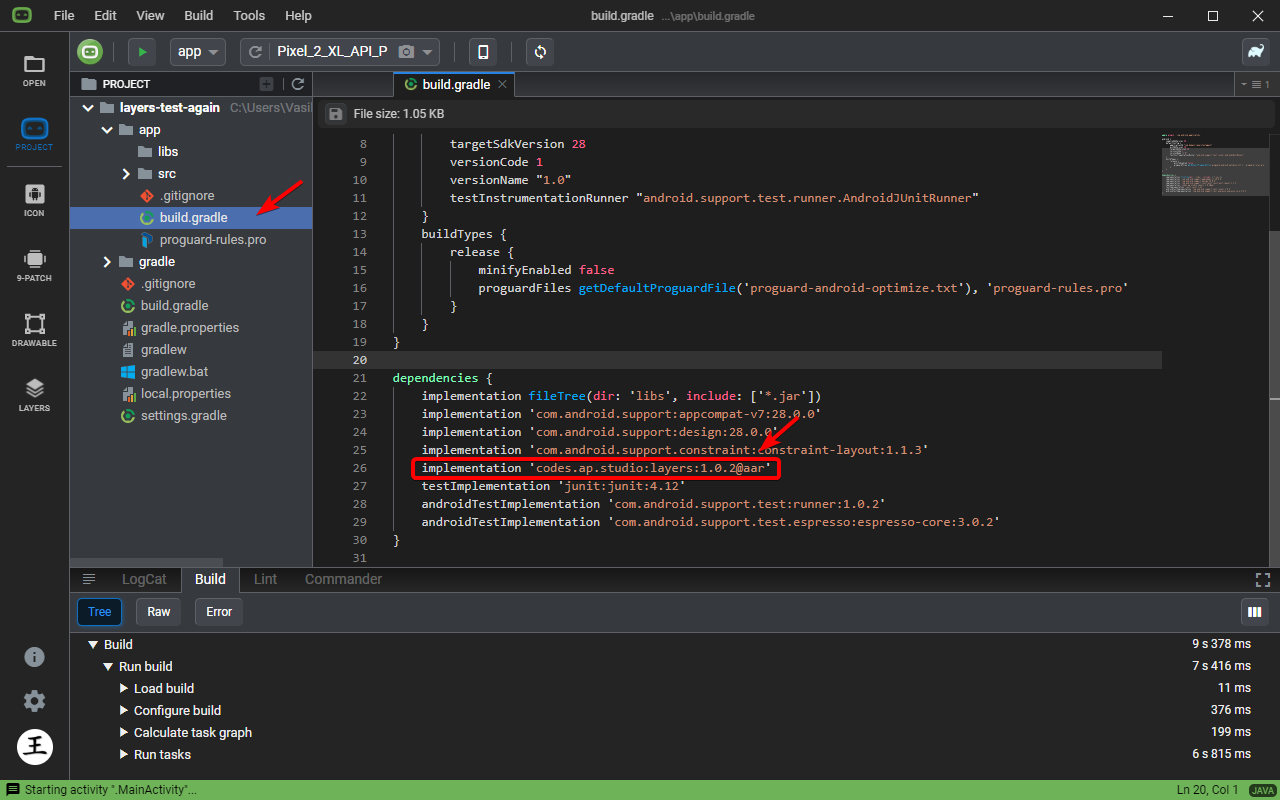 |
implementation 'codes.ap.studio:layers:1.0.2@aar' |
Step 3 Initialize layers in a subclass of Application
star It's a good idea to have Layers only work while debugging. If you wrap it in a BuildConfig.DEBUG "if" the lib won't get into your production build at all.
star Of course make sure you set this subclass in your AndroidManifest.xml
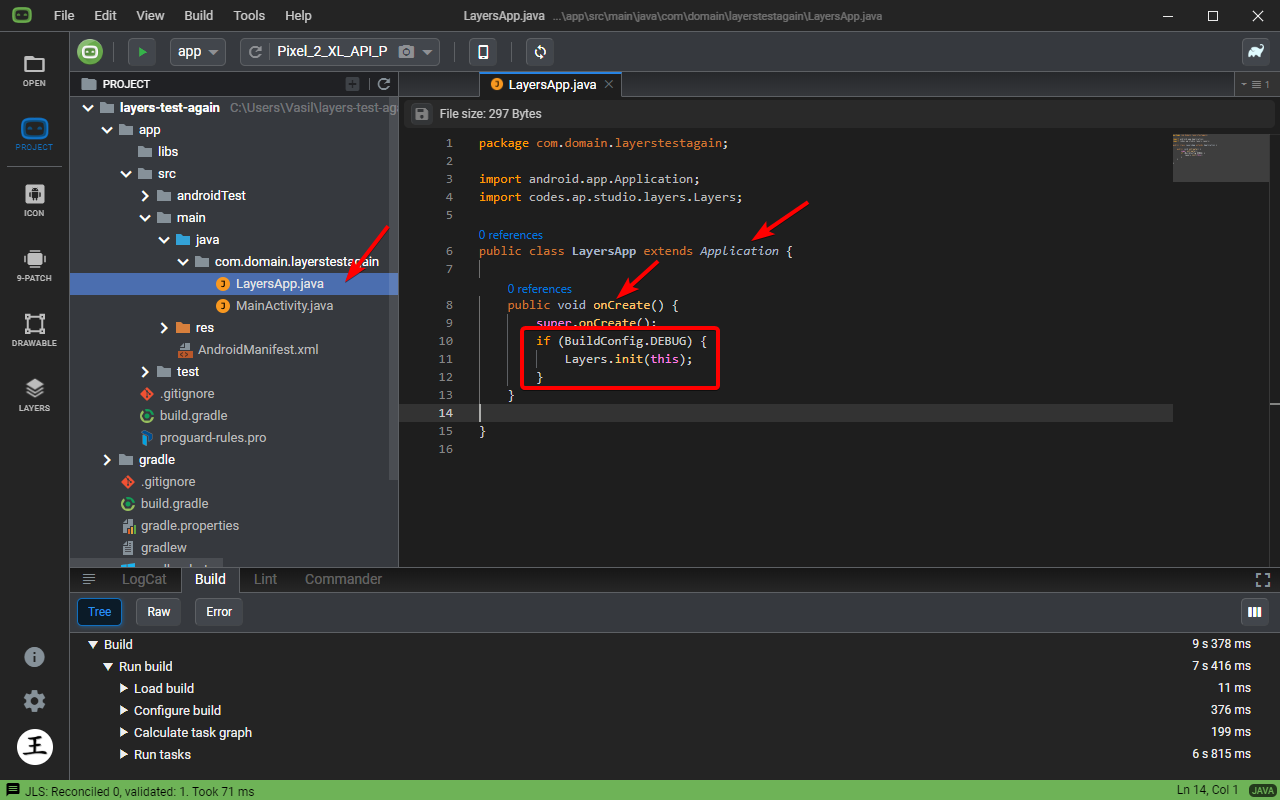 |
        if (BuildConfig.DEBUG) {
            Layers.init(this);
        }
|
Step 4 Have the android.permission.INTERNET permission
star In the AndoridManifest.xml file at the correct place just type "it" and select "Add Internet permission" to have the editor add it for you.
 |
<uses-permission android:name="android.permission.INTERNET" /> |
You are all set!
Enjoy using Layers for debugging your Android Views or creating cool screenshots for presentations and marketing!